Virtual Reality Know-How: Bringing a Sketchup Model Into the Oculus Rift
This tutorial will take you through the steps of placing yourself, via virtual reality, into an existing Sketchup model. This technique is great for testing out design iterations, showing architectural proposals to clients, and trying out complete 3D environments.

You will need:
A working copy of Sketchup Pro (paid or free trial)
A copy of Unity 3D
Oculus Utilities for Unity
instructions
Bringing your 3D Model from Sketchup to Unity:
1. Open your model in Sketchup Pro. The position of the camera within the Sketchup interface doesn't matter, so don't worry about taking the time to set that up just yet. We'll position the camera later on, in Unity.
2. Make sure your texture mapping is already done in Sketchup. Here's a tutorial if you're not sure what that means.
Pro Tip: It will make life a whole lot easier if the materials used in Sketchup are consistent with one another and well organized, so do take the time to clean up your file in preparation for step 3.
3. Export your 3D model from Sketchup as a .fbx file.
Pro Tip: We recommend saving to your internal memory, as opposed to an external hard drive, since there will be a lot of computing power involved later in the processes to follow. Having everything saved locally will speed things up.
When the FBX Export Options dialog box pops up, check the boxes as indicated in the following image:

Hit "OK" and let it think, this could take a few minutes depending on the size of your file. Once that's finished, you can go ahead and close Sketchup.
4. Open your Oculus Utilities application.
Click "New Project" and fill in your project name and location. Make sure "3D" is selected before hitting "Create Project", see image below:

Pro Tip: Again, we recommend saving everything on your local hard drive as opposed to an external drive or server to speed things up.
5. Once you hit "Create Project", Unity 3D will automatically open. The interface looks like this:

Right-click anywhere in the "Assets" bar at the bottom of the page, and choose "Import New Asset". Find and select your .fbx Sketchup Export file, and hit "Import". Again, this might take a while to load depending on the size of your file, so give it a few minutes.
6. Drag and drop the thumbnail of your model from "Assets" into the main "Scene", and you'll see it appear in the main frame of the interface:

Pro Tip: Moving around your model in Unity is a lot different than moving around in Sketchup. Use your middle mouse button to pan and your right mouse button to rotate around. A little bit of fidgeting and you'll get the hang of it!
Positioning the Camera:
7. On the left-hand side of the Untiy Interface, you'll see a section called "Hierarchy". This contains all the elements in your scene: the 3D model you just brought in from Sketchup, directional light (the sun), and the main camera. Clicking on the main camera will show you the location and field of view, displayed as a cone, in your model.
Moving the camera around your model is achieved by clicking and dragging the coloured arrows representing the X, Y and Z-axes until you see your desired shot in the Preview Window. To rotate the camera, select the "Rotate" tool from the panel above "Hirearchy", and again drag one axis at a time until your camera is pointing in the right direction.

Pro Tip: Make sure your camera is at human eye-level height (1.5m or 5' ish) to achieve a realistic perspective in the Oculus Rift.
Once your camera is placed in the desired position, click on "Game" (next to "Scene" at the top of the main display) to preview your camera position full-screen. Now is a good time to go back and adjust the camera's position and angle until you're completely happy with it.

Optional: If you'd like to make multiple cameras, just click "Create" below "Hierarchy" and select "Camera" at the bottom of the list before repeating step 7. The number of viewpoints you can create here is limitless. To switch between cameras in the Oculus, you must disable all other cameras which is done by unchecking the box next to "Camera" in the right-hand dialog box.
adding materials & textures:
8. If you don't already have texture maps, you'll have to acquire one for each material in your model. This usually includes a high-res .jpg image of your texture, and a bump map at the very least. For more information on material properties, click here.
Once you have acquired your texture mapping files, Right-click on "Assets" and Import these files one by one.
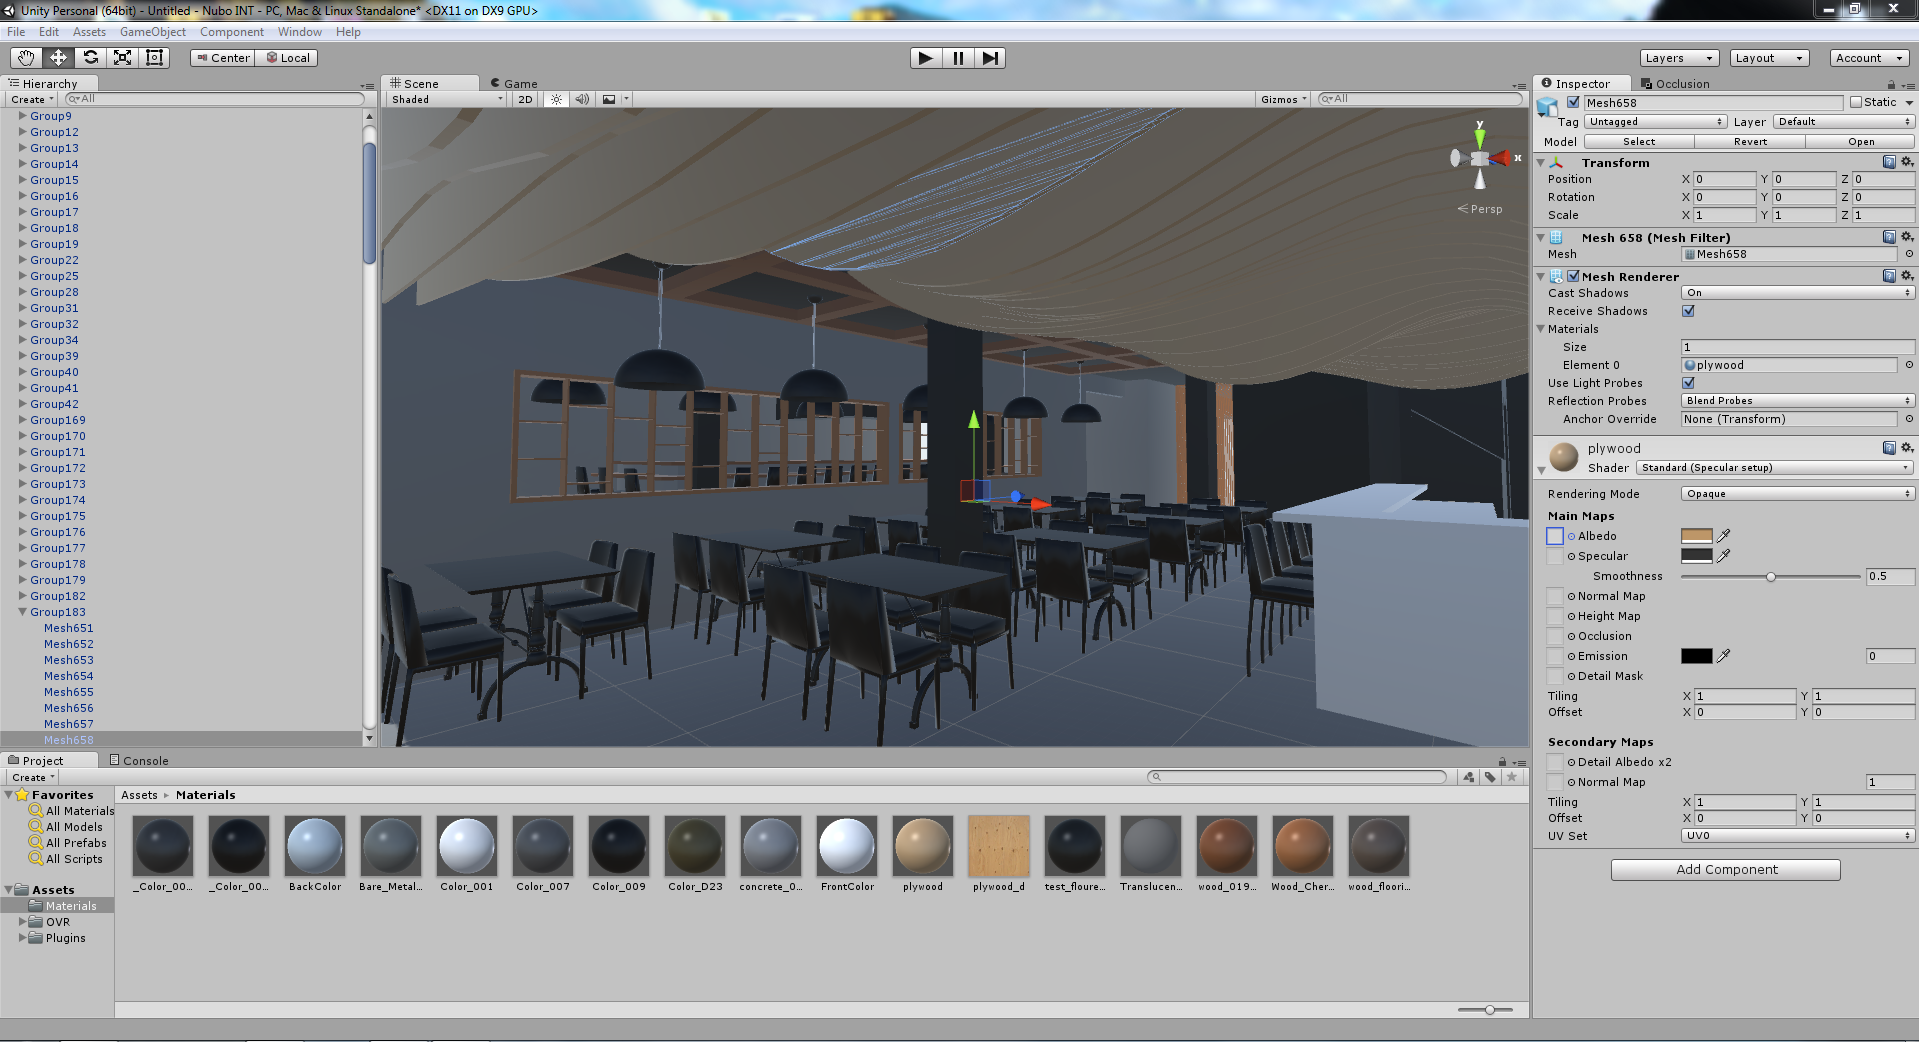
9. To apply a material to an object, we essentially need to link the Sketchup texture to a Unity 3D texture. To do this, position yourself inside the model in your "Scene" window, and double click on the object you'd like to apply a material to. A panel will show up on the right side of the screen containing all of the settings for that material.
Double-click on "Albedo" and select your high-res jpg texture map image. Play with the settings labelled "Tiling" and "Offset" to scale the texture to be the right size in your model.
Double-click on "Height Map" and select your bump map. Play with the "depth" parameter until the material looks realistic.
Repeat for every material in your model. The above steps only need to be done once per material, as long as your materials were organized and consistent in Sketchup at the beginning of this process.
Creating and Adjusting Lights:
10. Under "Hierarchy", click "Create" and choose "Light". We're making spotlights in this tutorial, but you can follow this link to learn about all the different types of light available in Unity 3D.
Once again, use the 3-axis click-and-drag technique to move the light to your desired position. Drag the points on the circle at the end of the light cone to adjust it's breadth (how wide the light shines).

Once again you'll see your settings on the right-hand side of the screen. Play with the "Range" and "Intensity" settings until your light looks bright enough, and we've chosen a pale yellow under "Color" to make the light appear warm. Finally, choose hard or soft shadows under "Shadows" and you should be all set!
Pro Tip: If you need multiples of the same kind of light, as we do in our example, you can right-click on the light in the list under "Hierarchy" and select "Duplicate" as many times as you like.
Viewing your model in Virtual Reality:
11. Click on "Edit" > "Project Settings" > "Player" to bring up the Player settings panel, and check the boxes as indicated in the following image:

Click "Apply" and give it a minute or two.
Pro Tip: Now is a good time to Save Scene and Save File, as the next and final step can sometimes crash the program if your model is too complex or your graphics card is too weak. Wouldn't want to lose your progress!
12. Finally, press the "Play" (triangle) button, and put on your Oculus Rift!
